OAuth integration
Overview
OAuth lets your product offer a Connect SolarAssistant button. Your user clicks it, signs in to SolarAssistant, chooses which one of their sites to share and is returned to your product. You never see their password and nobody pastes an API token into your app.
This is for developers whose product reads sites that belong to somebody else, such as a monitoring service or an energy app. If you are a solar business building a portal for your own customers, see the custom portal instead.
The developer guide and two working examples (one that runs in the browser, one that runs on your server) come with the @solar-assistant/oauth package on GitHub.
Step 1 - Open the Applications tab
An application belongs to an organization. If you do not have an organization set up yet, register an organization first.
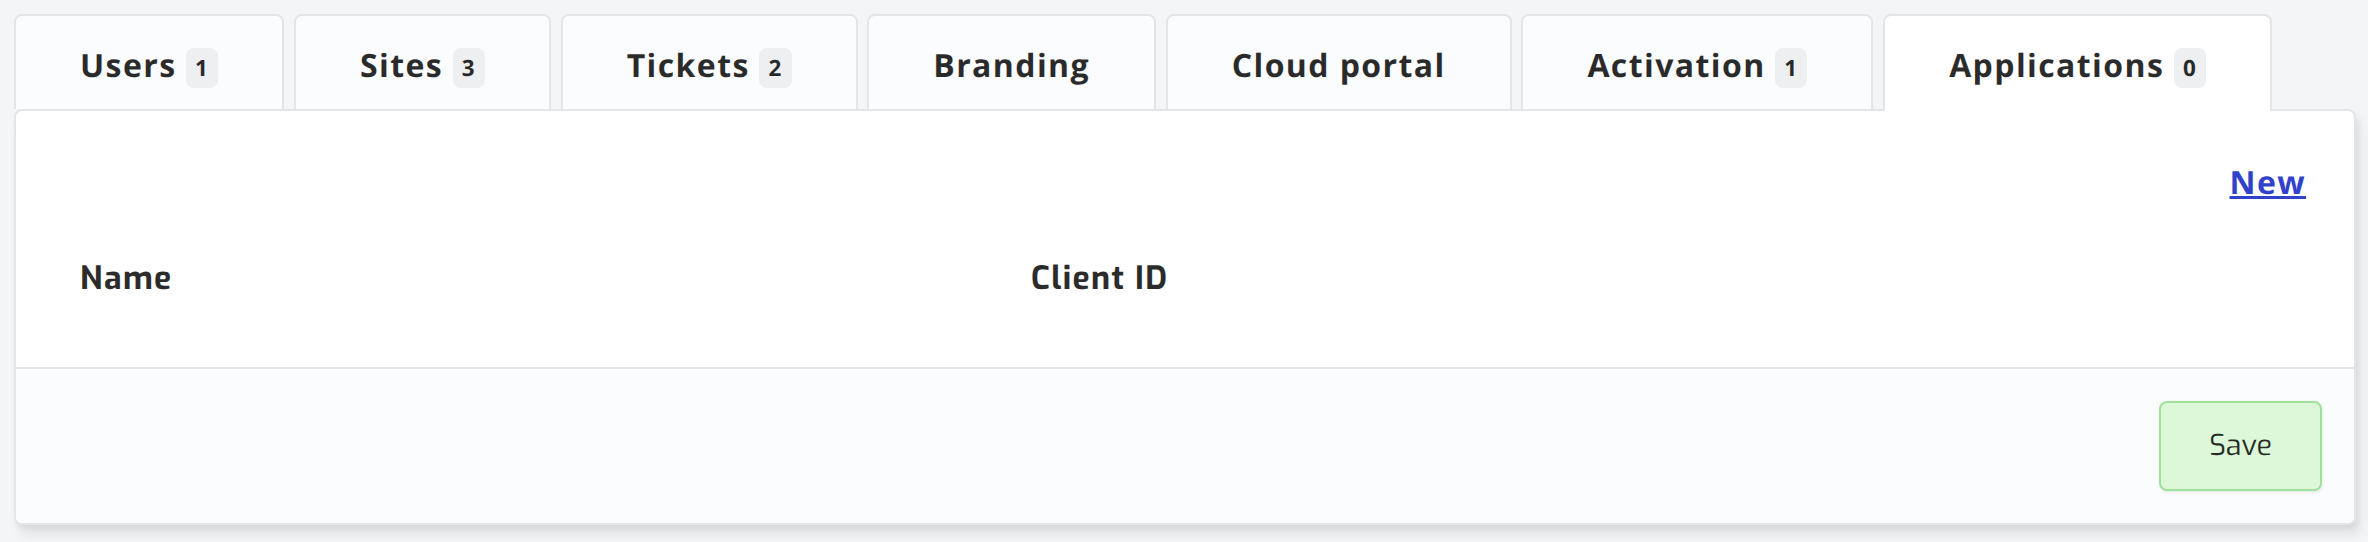
Open your account page and select your organization. Open the Applications tab and click New.
Step 2 - Add the application
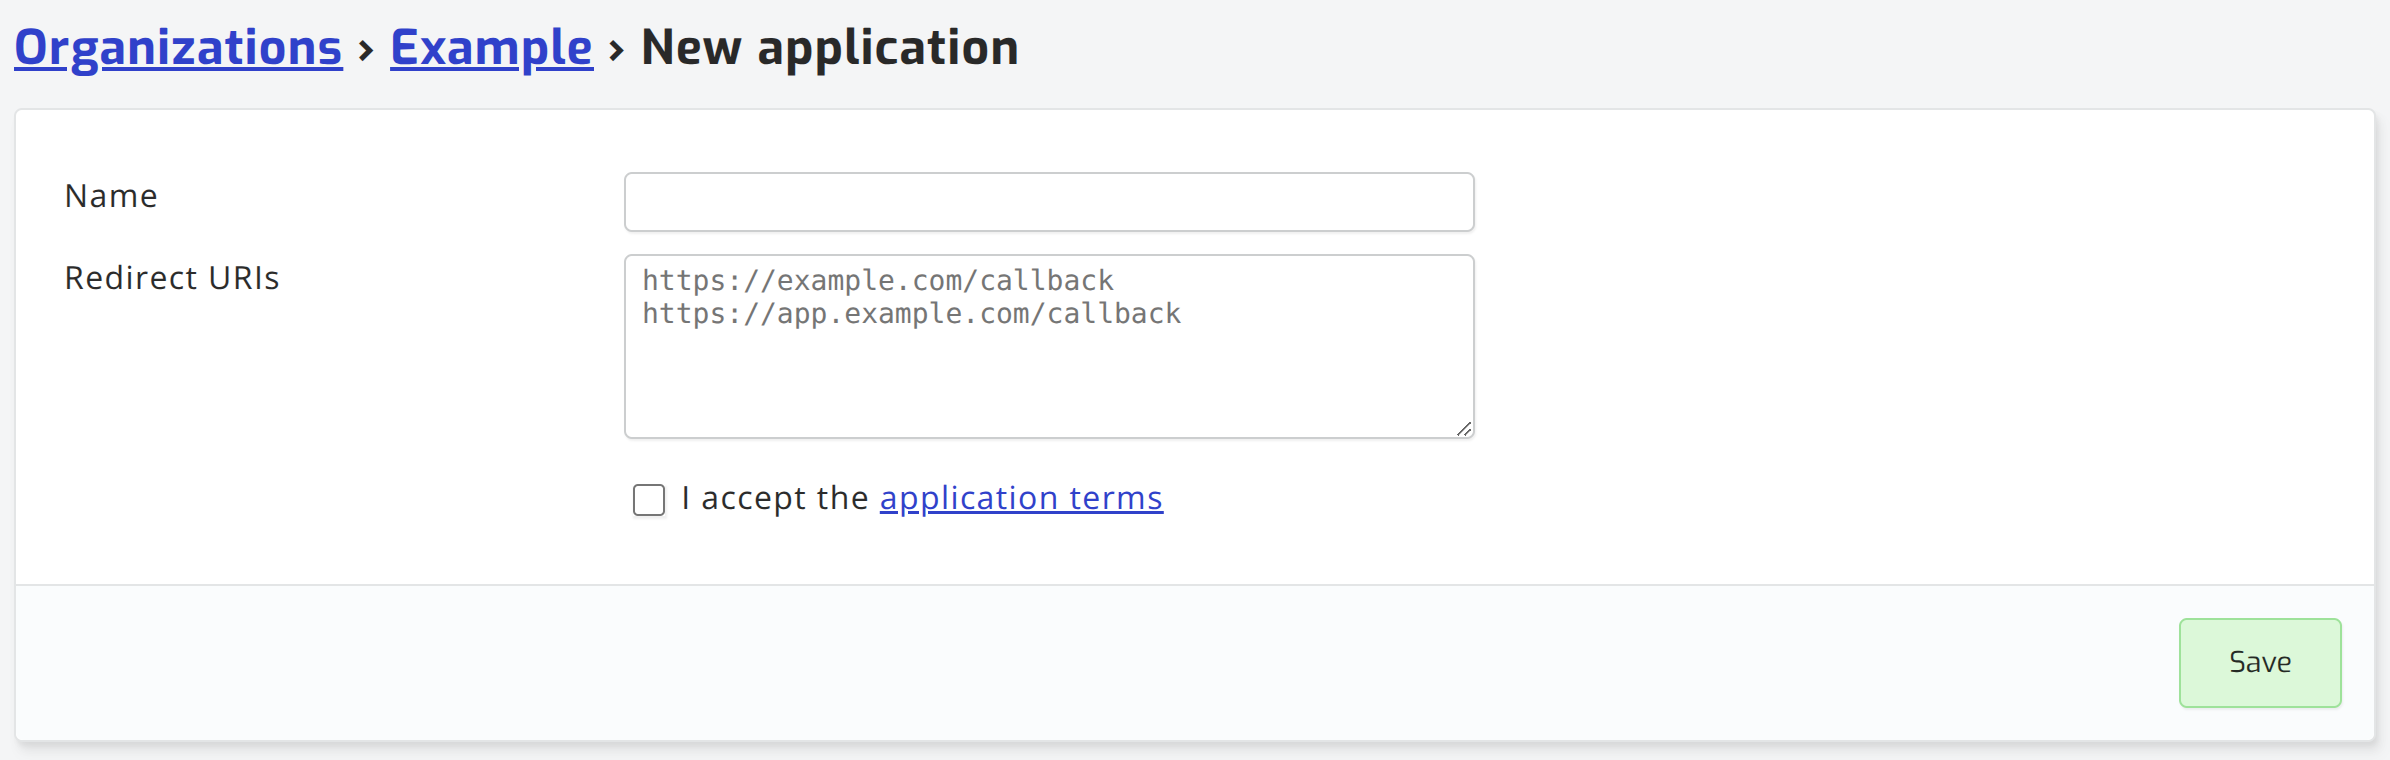
Enter a Name. Your users see this name when they are asked to allow access, so use the name of your product.
Under Redirect URIs, enter every address your application may return to, one per line. Include the one you develop against, for example:
https://app.example.com/oauth/callback
http://localhost:8000/oauth/callback
Accept the application terms and click Save.
Step 3 - Copy the client_id and client_secret
The application page now shows your client_id and client_secret. Copy the secret
straight away. It is shown once and is masked the next time you open the page.
Keep the secret on your server and never in a web page or a mobile app. An application that runs entirely in the browser does not need it, because it uses PKCE instead.
You can return to this page at any time to change the name or the redirect URIs.
Step 4 - Build the flow
Follow the OAuth guide on GitHub. It covers the authorization request, the token exchange for both a browser and a server-side application, and how to handle a user who declines.
Two scopes are available:
| Scope | The user is told |
|---|---|
openid | View your basic profile information (such as name and email address). |
sites:read_single | Provide your organization read only access to the selected site below and its associated monitoring data. |
With sites:read_single the user chooses which one of their sites to share. The token response
tells you which site they chose.
What your user sees
Your user signs in to SolarAssistant if they are not signed in already. They see the name of your application, what it is asking for and the name of your organization. They select the site to share and click Allow access.
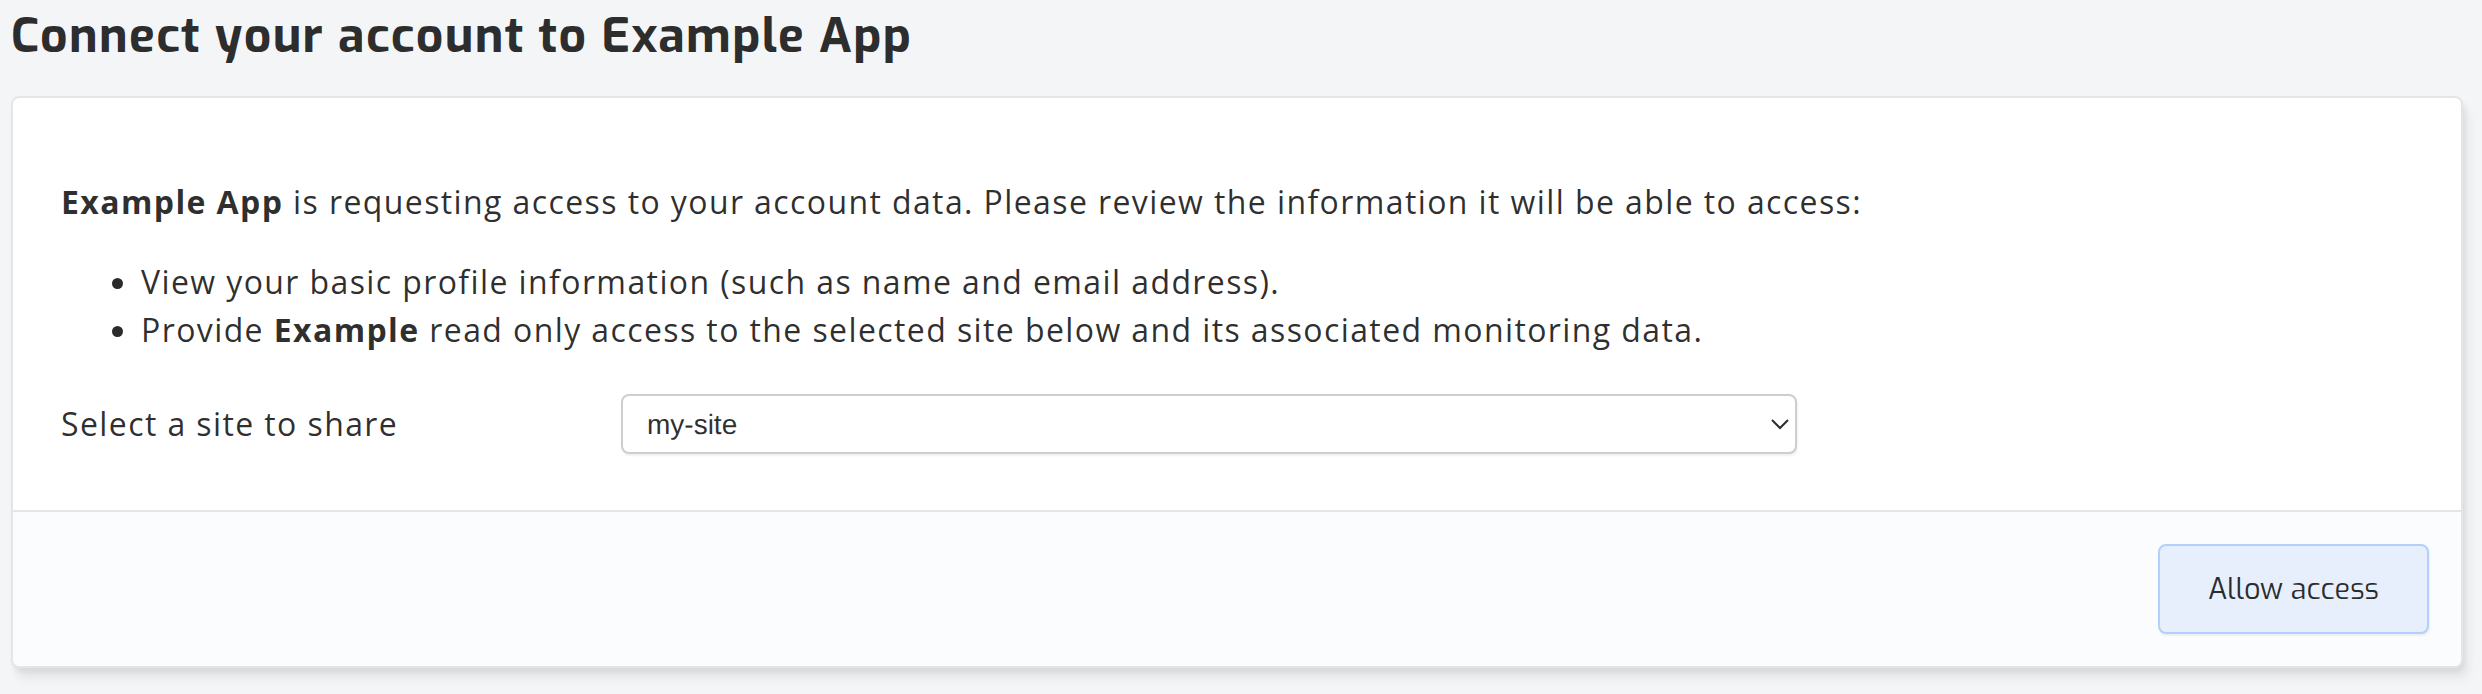
They are returned to your redirect URI. A user with no sites cannot continue.
Keeping access after the token expires
The access token lasts 24 hours and there is no refresh token. For a product your user comes back to, add the site to your organization while you hold the token:
curl -X POST https://solar-assistant.io/api/v1/organization_sites \
  -H "Authorization: Bearer <access_token>" \
  -H "Content-Type: application/json" \
  -d '{"site_id": <site-id>}'
From then on the site is readable by your organization. Read it with your own API token through the Cloud API, which gives you the REST API and the WebSocket API of the site. Each user goes through the flow once.
Access granted this way is read only. It stays in place until it is removed, and today only SolarAssistant can remove it, so ask for it when your user has chosen an ongoing relationship with your product.
Need help?
Contact us if you get stuck or need something the API does not offer yet.